Wednesday, March 23, 2011

DIY maternity pants


I guess I better start by answering the big question before I begin this tutorial. Yes, there is a reason I’m stocking up on maternity clothes- we are expecting our 4th child this November. Yep, the Cunningham family circus is growing yet again- and we could not be more thrilled (actually, not completely true- I would be more thrilled if I could just skip over this whole morning sickness thing). Anyhoo, let’s get going on this tutorial…
A couple notes first: This project can be done using a regular sewing machine, but can I just give a little shout out to my new best friend- my Juno by Janome SERGER!! This thing is the coolest toy I’ve ever owned! I could not believe how quickly and wonderfully this thing works! If you’re looking to get more serious about sewing clothes and other goods for your family, this is the perfect investment! A serger will help you create commercial-quality clothing easily and quickly! I cannot say enough….but we must move on!


Here’s why I decided to make my own maternity clothes this time. Unfortunately, after baby #3, Corey and I decided we were finished having kids and gave away EVERYTHING, large tub of maternity clothes included. But as God always does, He laughed at our plans. And He has since been so good to open our hearts to His plan for our family, and we are now beyond excited about accepting the blessing of children. So with the future of my childbearing firmly placed in God’s hands (and out of mine, where it never belonged) I may need some good maternity clothes lying around. ;)

I’m actually doing a tutorial now, I promise.

What you need:
Regular pants, shorts, or skirt that fit you well pre-pregnancy
Stretchy fabric (I actually used some old t-shirts I got for $.65 ea. At Goodwill)

Machine & thread

What to do:
Cut your pants starting at the back right below the belt loops or about 1 ½ inches from the top. Then continue cutting across the front, slightly curving down toward the middle, cutting right across the middle of the zipper and back up to the other side, meeting up with the cut from the back.
Get your s
tretchy fabric and cut a piece 45 inches by 8 inches. IMPORTANT: Look closely at your fabric and make sure the stretch runs right to left and not up & down or the band will not hold properly.
Now take your fabric and fold it in half lengthwise. Wrap around your belly to see how long to cut your fabric. If you plan on getting bigger, allow some room for growth.
Find where you need to sew the two ends together and pin. Then sew. Now take your band and fit it around the cut waist of the pants. Pin and sew. That’s it! You’re done!


Since many of you may not be in the market for maternity clothes, pass this on to someone you might know who is- this DIY project could be a life-saver (at least a BIG money-saver)!


Thanks for reading! I’ve really been enjoying all the great feedback from the last few posts- keep it coming!
Sarah

Friday, March 18, 2011

Re-purposed Cabinet Door


You've already seen my tutorial for the cabinet door-turned-chalk board. Well, this is a similar project idea using one of my fabulous $2 cabinet door samples from Menards. To create this bulletin board I used a flat paneled cabinet door (sorry- I forgot to take "before" pictures.) I primed and painted it with Rustoleum primer and Antique White spray paint.


Next, I cut a piece of cardboard (yes, it's a diaper box- classy, huh?) the exact size of the flat panel of the cabinet. I then covered it with a piece of fleece by spraying it with spray adhesive and spreading the fleece flat over the top and about an inch of extra around the edges on the back side. Confusing? See the photo.


Next, I did the same step again but with the top fabric. Then I took a coordinating fabric and folded it in half the width of my cardboard plus about 4 inches to wrap around the back


. My folded in half fabric only covered the bottom few inches of the board and will creat a little pocket to place additional items. So follow the same steps with your "pocket" fabric but only glue it to the back of the cardboard. Now all you have to do is glue your cardboard panel to the cabinet door. I also used a sander to distress my cabinet, mainly because my paint job got a little dinged up. But that step is completely optional, depending on the style you're going for.


Now hang your bulletin board, get some push pins, and fill it up!


Enjoy!


Sarah

Easy Make-Ahead Breakfast Sandwiches


I love quick breakfast items that can be warmed and eaten on the go. I used to buy these great Jimmy Dean sausage croissant sandwiches that are frozen and microwaved. But on my last trip to the store I happened to check out the back of the box for the nutrition info. I probably should have known better, but I was shocked to see a whopping 480 calories for one tiny sandwich! And jut one does not even fill up my kids (let alone Hubby, who eats 2 at a time).


So my solution? I make ahead and freeze my own, healthier and less expensive, version.


First you need to decide how many you want to make. I make 18 at a time. Next, decide what you will use for the bread. I got two packages of English muffins (light, whole wheat) at Sam's for just over $4. You can also use bagels, croissants, sliced bread, etc.


I split the muffins, lightly buttered and baked them for about 10 minutes at 425 degree- until they are lightly browned.


While your bread is browning, scramble up your eggs. Use one egg per sandwich. I got some pre-cooked turkey sausage patties and microwaved them for about one minute.


Once everything is cooked, add a slice of cheese, assemble, and you're ready to go! I wrap each 
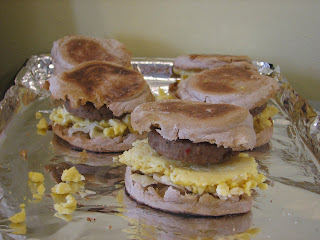
individual sandwich in a paper towel and place it in a sandwich bag and place those in a gallon sized freezer bag. So when you're ready to eat, just take it out of the bag and microwave about 1 minute.

These sandwiches make a quick, healthy breakfast on the go for less than $.75 and 250 calories a piece.

If you try these out, please let me know what you think!
Thanks for reading,
Sarah

Wednesday, March 16, 2011

Mason Jar Soap Dispenser


Need to give your kitchen a little retro, country make-over? Here’s a simple way to do it! Combine two functional items in one to create a unique, eclectic look for your kitchen or bathroom. So check out this tutorial to create your very own mason jar soap dispensers. Enjoy!


What you need:
Mason jar (or any well-cleaned glass jar with metal lid)
Plastic soap bottle with pump on top
Spray paint
Spray primer
Spray glass froster (optional)
Drill bit the size of the soap pump’s circumference
Note: All of my spray products are Rustoleum brand, which I LOVE! They cover super well and dry fast!

What to do:
1. If you desire a frosted glass look, use a glass-frosting spray to lightly spray your jar. I used my Cricut to cut a scrolled design onto a vinyl sheet, then stuck the decal onto the jar and sprayed over it. This created a cute stencil detail on my jar. If you prefer, you can skip this step- your soap dispenser will still look great!
2. Remove and clean the soap pumps from the bottle and wash and dry them thoroughly. You will first want to spray them with a couple coats of a spray primer. Allow this to dry for at least an hour (I know, I hate the steps that require patience, too!) Then you’re ready to paint the pump. I used this American Classics Metallics (Another great Rustoleum product) for a dark coppery type finish.
3. Now you need to find a drill bit the size of the circumference of the bottom part of t
he pump. Drill your hole and set aside.
4. This part is a little tricky to explain, so bear with me. You will need to make a cut (my hubby did this with a hack saw) right underneath the threads of the opening of your bottle.
5. Now screw the top of the pump onto the bottom part with the mason jar lid in between them. Clear as mud? I hope the pictures help!
6. Fill your jar with soap (or hand sanitizer, lotion, etc.

Sunday, March 13, 2011

Cleaning Products Make-Over

Call it what you will- Going Green, simplifying, re-purposing, etc. But I know many families shifting their way of thinking when it comes to the way we use our resources. In the name of frugality, my husband and I have started taking a very close look at the things we purchase and use on a daily basis that can be made at home in a matter of minutes and for a cost that’s literally pennies on the dollar.


So for the next few weeks I will be posting many ideas, recipes, and tutorials focused on home-made versions of items that one would normally not think twice about purchasing on a routine grocery shopping trip. You probably would be shocked (I was) to learn some of the things you can find “recipes” for online! What are some examples? I’m glad you asked! Just to name a few: lotion, egg nog, taco seasoning, hand sanitizer, air freshener…. The list literally goes ON, and ON, and ON. No joke. SO I’ll leave my rant for now to focus on the topic of today’s post- CLEANING PRODUCTS!

Here is a before and after look at my cleaning supply cabinet. This photo shows the products I started with. These are the cleaning products I use most often and desired to replace with less harsh, cheaper, and more “green” options. Here are the results of my little experiment:

Before:
· Total cost- about $14-$16
· Contains harmful toxins found by the EPA to be linked to cancers, birth defects, and asthma
· Pollute rivers and oceans and are quickly killing off marine life in what marine biologists are calling wide-scale epidemic destruction of ocean ecology and wildlife.
· Leaves harsh chemical smell and residue not safe for children & pets


After:
· Total cost- about $2-$3
· Made from all-natural ingredients (most of which you probably already have on hand).
· Use essential oil to create your own unique fragrances
· No danger to little ones or pets
· And by the way, they all worked just as well (or better) as the originals!


All you need- baking soda, water, vinegar, lemons (or juice), borax, olive oil, essential oils.

Creamy Soft Scrubber
3 cups baking soda
1 cup water
¼ cup lemon juice

Mix all ingredients well and pour into container. Shake well before you use. Squirt a small amount onto a sponge or scrub brush. This works great for cleaning your bathtub, toilet, sinks, etc.

Disinfectant Spray
½ cup borax
3 cups water
¼ cup white distilled vinegar
3-4 drops essential oil (whichever scent you desire)

Mix ingredients and pour into spray bottle. This works great in the kitchen & bathroom.

Glass Cleaner
3 cups water
½ cup vinegar
¼ cup lemon juice

Mix ingredients and pour into spray bottle. This cleans glass surfaces very well with no streaks!

Furniture Polish
1 cup lemon juice
1 cup olive oil

Mix ingredients and shake well before using. Dab a bit on an old cloth or rag and use for wood furniture to polish and shine. This will leave a bit of oil behind, so use another dry cloth to rub it in completely.

Overall, I spent NO MONEY ( I was lucky enough to have everything on hand), and it took only about an hour to make it all! I added the new labels with scapbook paper, my label maker, and contact paper. I hoped the cute packaging might motivate me to clean!

I can't wait to hear what you think! Try these out and let me know how these wok for you!

Tuesday, March 8, 2011

Tiered Skirt Tutorial


Well, I think I may have just made the cutest skirts I’ve ever made for my girls! I wish I dreamed this up on my own, but I cannot take the credit. I’d been wanting to sew some tiered skirts but didn’t have extra room in the budget to go out and get coordinating fabrics. So my love-hate relationship with Walmart tips to the LOVE side this week after I scored some AMAZING deals on sets of fabric. My local Walmart got rid of its fabric cutting area and now sells pre-packaged sets of fabric , some in kits. So I found these kits of 3 yards of fabric (1 yard each of 3 coordinating prints) that I knew would make perfect tiered skirts for my girls! And the kits were $1!

I found this wonderful idea at Chica & Jo .
http://www.chicaandjo.com/2009/05/28/sew-a-tiered-ruffled-skirt/ They included great pictures and easy instructions- but the best thing about their site is the skirt measurement calculation tool. This skirt requires several cuts of fabric in different sizes, but all I had to do was enter the waist measurement, desired length of skirt, and number of tiers. And it gave me the exact measurements to cut my fabric! So easy!!!

Here is the tutorial. Enjoy!

First, Go shopping! Have fun picking out a few coordinating fabrics. The possibilities are literally endless!

Once you’ve picked a few (3-5) fabrics, you can get started! Use the skirt measurement calculation tool to measure and cut the fabric for each layer. You might want to number you layers with a pencil in an inconspicuous area of the fabric.

Start with your second tier. You will prepare your waistband on the first tier later. The second tier on the skirt will need to be gathered on one long edge, so that it is ruffled. To do this, start by adjusting your sewing machine so that the stitch is as long as possible.

Then sew right down one long side of the fabric. When you’re done, pull one end of the thread to gather the fabric up into a ruffle. Keep pulling as needed until the finished width of this tier is the same as the finished width of the tier above it.
Now line up the first and second tier, and make sure that they are the same width. If not, adjust the ruffling on the second tier as needed.

Lay the second tier on top of the first, right sides together, and match up the top (ruffled) edge of the second tier with the bottom (unsewn) edge of the first tier. Pin in place.

Sew along the pinned lines, making sure that you sew inside the previous ruffle stitch, so that it doesn’t show through on the finished skirt. Unfold it and see that you’ve got the start of a skirt, with the waistband on top and a ruffled tier on the bottom.

Add the third tier
Take the third piece of fabric and sew along one edg
e as before, then pulling the bobbin thread to make a ruffle. This time, the final width of the fabric should match the final width of the second tier above it. Just keep adjusting the ruffling until you get the widths the same.

Then lay the third tier on top of the second, right sides together, with the ruffled edge of the third tier lined up with the unsewn edge of the second tier. Pin in place.

Now sew along the pinned line, again being sure to enclose the previous row of stitches so that it won’t show. When you’re done, unfold it and admire your progress.

Add the remaining tiers
If you’ve still got more tiers to add (this part is up to you!), go ahead and do them now, following the same method as before. My skirt had 6 tiers, so I had quite a bit to add, and the skirt got nice and full by the time I was done!


Finish the hem
For the hem, start by folding 1/4″ of the bottom tier over and ironing it. Then fold the entire seam over again and iron again and sew in place, securing the hem and hiding the rough edge. Be sure to use a matching thread on this second seam, because it will show on the finished piece.

Sew up the side
You’ve got this pretty ruffled piece of fabric, but it’s not a skirt unless we sew the ends together to make a loop! Line up the two ends of your fabric, right sides together. Pin in place, then sew the seam.


Create the Waistband
Measure a piece of elastic to that is the right length to fit comfortably around your child’s waist, with one extra inch to spare. To attach elastic and finish your skirt, find the seam at the side of the skirt. Now take the elastic and make a loop leaving ½ inch overlapping at the ends. Place the overlapping section of elastic over the skirt seam about 1 ¼ inch from the top of the fabric. Sew from the top to the bottom of your elastic. For the elastic casing, fold the top of the fabric over the elastic and sew underneath the elastic around the entire circumference of the skirt. You will probably be stitching over the stitch you sewed for your gather.
Voila! You're done. Trim, press well and let that little girl put on her new skirt!

Sunday, March 6, 2011

Rainbow Pancakes & Home-made Syrup


Our Sunday morning pancake tradition got a fun update with this neat idea! We turned plain old pancakes into “the best pancakes I never had in the whole world“ (in the words of my 3 year old Caleb). And all it took was a few drops of food coloring! I took my batter (use any boxed mix or recipe you like) and divided it into five cups. This allowed me to mix and pour the batter more easily than with a bowl. That’s pretty much it! Add your food coloring. Cook ‘em up, stack ‘em pretty, and listen to the squeals of delight from your little ones (and hubby)! I promise- they will be thrilled!

And since I realized I was out of syrup as I was putting breakfast on the table, I had to think fast. I quickly Googled “Syrup recipes” and what do you know? There were tons of them! I had no idea I could make my own syrup! The benefits of my accidental discovery? 1. It took 5 minutes 2. It cost about $.25- .50 to make 3. It perfectly filled a name brand syrup bottle I had on hand. AND no high fructose corn syrup! So Cool, huh? Here’s the recipe:


4 cups white sugar
2 cups boiling water
1 teaspoon maple flavoring
½ teaspoon vanilla

In a saucepan, combine sugar and water. Cook and stir until sugar is dissolved. Remove from heat, and stir in maple flavoring. Serve warm.


So there you go! I don’t think I’ll ever buy syrup at the store again. Let me know if you try this!
Thanks for reading,
Sarah

Thursday, March 3, 2011

The Home Store


Here’s another post inspired by the fabulous Amy at The Idea Room. We started using this great idea a couple months ago and WE LOVE IT!

We use our Home Store system as a behavior incentive for our children. We were a little worried when we started that our kids were a bit young, but at 5, 3, and 2, the little ones have completely embraced it! So here’s how it works:


Get a large plastic bin, tub or basket. This is your “Home Store”. Fill it with stuff your kids like- I stock up at Dollar Tree on small toys, art supplies, stickers, snacks, etc.
You will want to assign each item in the box a point value. (one though ten work well). I place color coded stickers on each item that correlate with a point value.
Create your point cards. I used Avery printable business cards and found a template that looks like a ticket. On the ticket, it says, “Nice Work! One Point- good for use at the Cunningham Family Home Store.”


My kids can earn points for all kinds of things- exceptional behavior, going above and beyond normal expectations, scripture memory…etc. So when you feel your kiddo has earned it, give him/her a point. And the same goes for losing points (but opposite- you get the picture, right?)


All of our kids points go in Ziploc bags with their names on them. We open the Home Store once a week, and the kids get to cash in the points they earned throughout the week. Daddy is the store keeper, and the kids LOVE counting out their points,
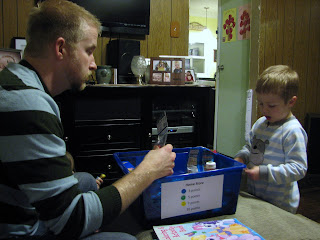
picking out their items, and “paying” for them( check out the above photo to see a transaction in progress :)
Another benefit of the home store? It's been great for practicing math skills!

This system works great even for my 2-year-old, and would be appropriate for older children up to early teens. Just find stuff they like and adjust the point values accordingly.

I can’t wait to hear from any of you that try this! I hope your families enjoy this as much as mine has!
Thanks for reading!
Sarah